Showing posts with label Quick. Show all posts
8.01.2013
Oven Roasted Sausage and Vegetables
We had a cold front come through that made it feel like Fall around here for a few days. I've had this recipe pinned for a while and the cool weather inspired me to give it a shot. It's a simple recipe that is easy to make, easy to clean up, and tastes great! The picture doesn't do it justice, but all of the different colors from all of the vegetables made it very pretty to look at well. If you use turkey or chicken sausage, it would be incredible healthy. This is also one of those rare recipes that even tastes really good the next day. Maybe even better than when I originally made it. Which was good, because as I made it, it made two 9x13 pans of food. You might want to cut the recipe down . . .
I served mine this with corn casserole and it was a nice pairing. I was a bit timid about the banana peppers as I was afraid they would make the dish too spicy, but it really turned out fairly mild and the banana peppers were not at all overwhelming.
Adapted From: Lilasapron
What you need:
28 oz precooked Sausage (I used polish sausage)
2 Lbs New Potatoes
1 Small Jar Sliced Banana Peppers, drained
1-2 Bell Peppers (I used one green and one orange)
1 Large Onion (I used white)
8 oz Mushrooms
3 Tbsp Olive Oil
Salt, Pepper and Other Seasonings to taste
What you do:
1. Preheat your oven to 400 degrees.
2. Slice the sausage, peppers, potatoes, onion, and mushrooms and toss them into a large bowl.
3. Drizzle the sausage and veggies with olive oil. Toss until the sausage and veggies are evenly coated in olive oil.
4. Add salt, pepper and other seasonings and toss again until the seasonings are evenly distributed. I added some garlic powder and Lawry's Seasoned Salt.
5. Place the peppers and vegetables in a 9x13 baking pan (or two, depending on how much you've made). Cover the pans with foil and bake for about 45 minutes. Remove foil and continue baking for 5-10 more minutes, or until the potatoes are fully cooked.
Enjoy!
6.13.2013
Healthy Tomato Pasta
A long time ago I bought this book. Like, probably 6 or 7 years ago. I went through and tabbed lots of recipes that I wanted to try. And I'm pretty sure I had not tried any of them until last week. I wanted pasta for dinner, but now that it's getting hot, I wanted a lighter pasta dish. So, loosely following a recipe in this book, I created a healthy, light pasta dish that is filling. Bonus -- it is quick and easy to make!
Adapted from: 500 Best Healthy Recipes by Lynn Roblin
What you need:
12 Ounces Rotini Noodles (I used wheat)
1 1/2 Tsp Olive Oil
2 Tsp Minced Garlic
1 Small Onion, chopped
2 Medium Tomatoes, chopped
8 Ounces Crumbled Feta Cheese
1/4 Cup Chopped Fresh Basil
1/4 Shredded Parmesan Cheese
1/2 Cup Black Olives
What you do:
1. Cook Rotini Noodles according to the instructions on the box.
2. When the pasta has approximately 5 minutes left to cook, heat the olive oil in a skillet on the stove. Add the garlic and onions and saute for about 2 minutes. Add tomatoes and cook for an additional 2 minutes, stirring constantly.
3. Drain and rinse the pasta.
4. Combine the pasta and the onions and tomatoes. Add the feta and parmesan and stir well.
5. Top with chopped fresh basil and black olives.
Enjoy!
9.07.2012
Pepperoni Roll-Ups
My friend Amber bought a house earlier this year. She had a housewarming party, like, a month later. I bought a house last year. I haven't had my housewarming party yet. When I do have it, it will be more than a year later. But, whatever. I'm not bitter. At all.
Amber was nice enough to let me bring lots of food to her housewarming party. That meant that I got to try lots of new recipes. This one was a big hit! Everybody loves pepperoni and melted cheese. Toss in a crisp, buttery crescent roll . . . Perfect! Plus, these get bonus points for being really easy to make.
Source: The Girl Who Ate Everything
What you need:
2 packages refrigerated Crescent Roll dough, garlic flavored
8 Cheese Sticks, halved
48-64 pieces of Pepperoni
Marinara Sauce and Ranch Dressing for dipping
What you do:
1. Preheat your oven to 350 degrees.
2. Place 3 to 4 pepperoni pieces on the bottom of the triangle of each
crescent roll.
3. Place one cheese stick half on top of the pepperoni on each
crescent roll.
4. Roll up each crescent roll and place seam side down on a cookie sheet.
5. Bake for 10-12 minutes or until the crescent rolls are cooked
thoroughly (until they are golden brown).
6. You can put out small bowls of marinara sauce and ranch dressing
for dipping if you would like.
Enjoy!
7.09.2012
Copy Cat Recipe: Mini Warm Delights
I've eyed these Mini Warm Delights in the grocery store for a looooong time, but always refused to buy them because you have to pay about $3.00 for two teeeeeny tiny little single serving cakes. I also thought that if I wanted a chocolate cake that bad, I'd just whip up an entire cake. Well, in a moment of weakness, I finally bought them a few weeks ago. I thought they were good, but still didn't think they were worth $1.50 each. However, I was quite consumed with the idea of making myself a delicious little cake in just a couple of minutes. So, I decided I'd try to copy the recipe.
I searched the Internet far and wide and found a lot of different recipes, but none were really all that appealing to me. So, I experimented with my own recipe. It turned out fabulous! Much better than I ever could have expected. And, I did a little taste test with my man friend and we both determined that my little recipe beats the Mini Warm Delights! My cakes are more moist and more dense than the Mini Warm Delights. I also think mine have a stronger chocolate flavor. Take that Betty Crocker! ;-)
I will warn you, the recipe below makes massive quantities. But, you have options. You can make the recipe as directed below and store your mix in Tupperware at home. I've even placed individual servings into small sandwich baggies and taken them to work so that whenever I need chocolate, it's there for me. Or you can just cut the recipe down and have less on hand -- if you do so, just make sure you maintain the chocolate cake mix to brownie mix ratio (1:2).
What you need for the cakes:
1 Chocolate Cake Mix
1 Box of Instant Chocolate Pudding
2 Boxes of Chocolate Brownie Mix
Miniature Chocolate Chips
Water
What you do to make the mix:
1. Pour the chocolate cake mix and instant pudding mix into one bowl. Stir well to combine the two powders.
2. Add the two boxes of brownie mix. Stir well.
THAT'S IT!
When you want to make yourself a little cake, put 1/4 cup of the mixture and a teaspoon or two of miniature chocolate chips into a ramekin dish. Add 7 Tsps (or 2 Tblsps + 1 Tsp) of water. Stir well with a fork. Microwave for 30-45 seconds. Then enjoy!
I put 1/4 cup of the mixture + some miniature chocolate chips into some baggies and took those, a ramekin, and a teaspoon to work. So, when I need a little pick-me-up, it's there -- more delicious than the Mini Warm Delights, less expensive, and just as convenient!
Also, if you add about 1 Tsp of Fudge Ice Cream Topping (like this, not like Hersey's Syrup) to the center of the ramekin before you microwave, you end up with a mini lava cake. See the gooey fudge there:
Experiment away with toppings for these little cakes! We've added whipped topping and ice cream and loved both!
Enjoy!
4.26.2012
Heath Bar Cake
My mom has this very sweet friend at her work named Karen. Karen is a great cook and has a heart of gold. One year for Christmas she made me a homemade recipe book with some of her family recipes. It is still my only recipe book. Right before Easter my mom told me about this great cake that Karen had brought in to work and asked me to make it for Easter. This cake is delicious and ridiculously easy. I made mine the night before Easter and let it sit overnight, which I think made it even more moist and delicious.
Here's what you'll need:
1 Chocolate Cake Mix and the additional ingredients called for on the box
1 Can Condensed Milk
1 Tub of Cool Whip
1 Jar of Caramel Sundae Sauce
1 1/2 King Size Heath Bars
Here's what you do:
1. Make the chocolate cake according to the box instructions.
2. Let the cake cool slightly (about 7 minutes). Take the handle end of a wooden spoon (or something of similar size) and poke holes throughout the cake. I made mine pretty uniform in a grid pattern.
3. Pour the caramel sundae sauce and condensed milk over the entire cake, trying to distribute evenly.
4. Cover and refrigerate for at least one hour.
5. While the cake is in the refrigerator, crush the heath bars. (I put mine in a Ziploc baggie and used my wooden spoon to break up the bars).
6. After the cake has chilled for at least one hour, "frost" the cake with cool whip.
7. Garnish the cake with the Heath Bar pieces. I suggest waiting until right before serving to garnish.
Enjoy!
2.27.2012
Double Chocolate Marshmallow Cupcakes
See that right there? That's the most amazing mistake ever. Seriously. I decided to try to make this. Except I didn't really read very closely and I accidentally bought the wrong ingredients. And, I love cupcakes, so I made them in cupcake form, of course.
I was making these for one of my book club meetings. Except I ran out of time to make them in advance and had to make them after I got home from teaching the night before our meeting. So, I got home around 9:30 pm and quickly threw together my version of this cupcake. But I didn't want to make a whole batch of my version and have them be terrible, because I had no time to make something delicious if they bombed. So, I made one cupcake and put it in the oven, thinking if it came out terrible, I could try to save the rest of the batter. Then I heated up my dinner and sat on the kitchen floor in front of my oven and watched my single cupcake bake. It was kinda like watching grass grow, except way more exciting. And, the end result was much more rewarding, I think!
See how the center of the cupcakes are darker than the outside? That's because the center is filled full of delicious moist fudge. And see how the tops look all sticky and gooey? They are. In the most delicious way possible, too. I thought the marshmallow would have been over the top with all the chocolate, but I couldn't have been more wrong. Marshmallow + Chocolate = LOVE.
These cupcakes must be eaten warm. (See the italics PLUS the underline??? I'm not kidding.) I took leftovers to work and left step by step instructions requiring those eating them to heat them in the microwave before eating.
The marshmallow melts into the cupcake, which gets pretty messy. I recommend eating with a fork.
Source: Confessions of a Cookbook Queen
Here's what you need:
1 Box Devils Food Cake Mix and the eggs, oil and water called for on the box
1 Jar Hard Shell Chocolate Ice Cream Topping (like this)
1 7oz jar Marshmallow Fluff
Here's what you do:
1. Prepare and bake cupcakes according to directions on the box.
2. As soon as the cupcakes are baked, pull them out of the oven. Using the handle of a wooden spoon, poke one large hole in the center of each cupcake (you want one large hole, not many small ones).
3. Fill each hole with the chocolate ice cream topping.
4. Put a dollop of marshmallow fluff on top of each cupcake.
5. Return the cupcakes to the oven and bake for about 2 more minutes.
6. SERVE WARM!
Enjoy!
2.17.2012
Baked Taquitos
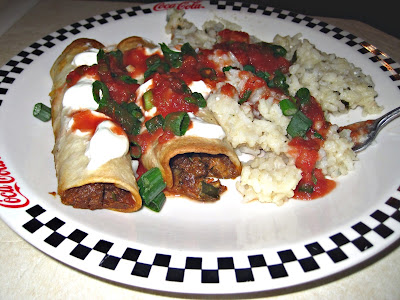
Here's a quick little dinner recipe that tastes great and is a healthy alternative to the fried taquito. Although these are baked, they didn't come out soggy. Instead that were nice and crispy, similar to fried taquitos. I served mine with cilantro lime rice and it was a perfect pair.
I found the recipe I based these off of on Pinterest. The original recipe provides that the taquitos can be frozen and baked later. I didn't get a chance to try freezing them because I ate them all. But, I'm pretty sure you would have the same success freezing my modification of her recipe.
Modified from: Pennies on a Platter
Here's what you need:
3 ounces Cream Cheese, softened
1/4 cup Salsa
1 Lime
1/2 tsp Ground Cumin
1 tsp Chili Powder
1/2 tsp Onion Powder
2 cloves Garlic, minced
3 tbsp Cilantro, finely chopped
2 tbsp Green Onions, sliced
1 lb. Ground Beef
1 Taco Meat Season Packet of your choice
1 cup Mexican flavored cheese, finely shredded
12 small Tortillas
1 tbsp Butter, melted
Kosher Salt
Here's what you do:
1. Cook the ground beef thoroughly. Season according to instructions on your season packet.
2. Combine cream cheese, salsa, juice of half of the lime, cumin, chili powder, onion powder, garlic, cilantro and green onions.
3. Add the ground beef to the cream cheese mixture. Mix well.
4. Add the cheese to the cream cheese mixture. Mix well.
5. Preheat your oven to 425 degrees.
6. Microwave 2 or 3 tortillas for about 20 seconds to make them pliable and easy to work with. Fill each tortilla with a portion of the mixture, beginning on one edge. Roll the tortilla up, beginning with the edge that was filled. Place seam side down in a baking dish or cookie sheet. Repeat until all of the mixture is gone.
7. Brush the top of each tortilla with the melted butter.
8. Sprinkle the kosher salt on top of the tortillas.
9. Sprinkle the lime juice of the remaining one half of the lime on top of the tortillas.
10. Bake for about 20 minutes. Remove when the tortillas begin to crisp.
2.07.2012
Energy Balls
My good friend Amber suggested that I try her AMAZING recipe for energy balls. A while ago. Like, last October. I quickly opened the recipe because I get all excited when my friends and family share recipes with me! Then I read the ingredients and quickly closed the recipe. Pfffffft! This recipe calls for wheat germ or flaxseed. And no sugar. At all!?! NO SUGAR???? Are you kidding me? Clearly, she didn't know me very well.
So I thanked her for her recipe and told her I'd put it on my list of recipes to try. Then I scoffed inside. Because I knew there was nooooo way I was going to make that silly hippie food.
Well, I've been feeling a little low on energy lately (helllllooo 15 hour work days). So, this weekend I got desperate. And decided to try her hippie energy balls. I had most of the ingredients on hand, so why not? And, I just knew that when I ate one and it tasted like cardboard, I'd be vindicated. And I could return to sugar as my main source of energy.
So, I made them. And then I ate one. And then I ate like one million more. Because these things are deeeelicious, people. There's no saving my pride here, folks. I owe Amber one big fat apology. So, here it is. You were right and I was wrong. (God, I hate how that sounds!)
Have a little faith in me and give these things a shot. Seriously, I promise, you won't be disappointed. They require very few ingredients and very little time. They're scrumptious, healthy, and they give you energy. What do you have to lose?
I like these so much that I'm already trying to come up with variations. But, for now, here is my version of Amber's Energy Balls:
Here's what you need:
1 cup Quick Oats
2 heaping tbsp Peanut Butter
1/2 cup Honey
1 cup mini chocolate chips
1/2 c wheat germ or flaxseed
2 tsp Vanilla
Here's what you do:
1. Mix everything together.
2. Refrigerate for 1 hour.
3. Roll into one inch balls.
4. Enjoy! Seriously -- that's it.
FYI -- Amber's recipe also called for coconut and dried fruit. I'm picky. I don't like coconut, so I omitted that. And dried fruit just didn't sound like it would fit all that well with all the other ingredients, so I kicked that out too. I could have been wrong about that. I've been wrong about other things. *aaahheeemm* Feel free to add those back in. She suggested a cup of each.
12.29.2011
Cookie Pie
I ended up with one million left over Christmas Cookies.
One Million. I counted.
Most of them were chocolate chip or M&M Cookies. For some reason, when cookies sit on my counter in plastic baggies, they get crushed into tiny little pieces. I think there is a little cookie smashing elf that comes around at night. See:
Anyway, I didn't want all these cookies to go to waste, so I decided to try making a pie out of them. This was super easy and it turned out delicious! You could do this with any left over cookie you have, not just Christmas Cookies.
Here's what you need:
3 Cups of Cookie Crumbs
3 Tbsp Butter, melted
Dash of Salt *optional*
1 1/2 Cups of Cookie Chunks (or more to taste)
8 ounces Cream Cheese, softened
2 Tsp Vanilla
1/4 Cup Powdered Sugar
8 ounces Cool Whip
Here's what you do:
1. Use your blender or food processor to grind your cookies into cookie crumbs. Grind enough cookies to make 3 cups of crumbs.
2. Melt butter.
3. Add butter to cookie crumbs. Mix until well moistened. I added a dash of salt because I buy unsalted butter and the crumbs and butter alone were a little too sweet for my taste.
4. Press the cookie crumbs into the bottom and sides of a pie plate to form the crust.
5. Beat the cream cheese until it is light and smooth.
6. Add vanilla to cream cheese and mix well.
7. Add powdered sugar to cream cheese mixture and mix well.
8. Fold the cool whip into the cream cheese mixture.
9. Gently fold 1 cup of cookie chunks into the cream cheese mixture.
10. Put the cream cheese mixture on top of the cookie pie crust. Garnish with remaining cookie chunks.
11. Refrigerate until firm.
That looks like a lot of steps, but, really, it's not that bad. It's mostly that I added one ingredient at a time. It took me about 10 minutes to make this pie.
I'm not a very good pie cutter, but here is what one of my "slices" looked like:
Enjoy!
11.22.2011
Peanut Butter Pie
There are certain dishes that I make every year, but only at certain times of the year. This is one of them. This is a delicious recipe that is easy to make, but tastes like it isn't. I'm not sure where the recipe came from . . . I may have gotten it from my Aunt Julie. But maybe not . . .
Anyhow, who doesn't like creamy peanut butter with a little chocolate on top? Nobody. That's who. So, why don't I make this pie more often, you ask? Because it's very rich. It doesn't matter how delicious a recipe is, too much of a good thing can be bad. So, I save this pie for holiday time. Although sometimes I make it and keep it in the fridge for breakfast. For myself. And I don't share.
Here's what you need:
1 Block of Cream Cheese, room temperature
1 Cup of Creamy Peanut Butter
1 Cup of Sugar
1 Cup of Heavy Whipping Cream
1 Pie Crust (sometimes I use a graham cracker crust and sometimes I use a chocolate one)
Chocolate Dessert Topping or Spare Chocolate Chips for Topping (optional)
Whipped Cream for Topping (optional)
Here's what you do:
1. Mix the Cream Cheese, Peanut Butter, Sugar, and 1/3 of the Cup of Heavy Whipping Cream until well blended.
2. Fold in the remaining Heavy Whipping Cream.
3. Gently spoon the mixture into a pie crust and smooth.
4. Drizzle Chocolate Dessert Topping on top and use a fork or knife to create a pretty design.
Hint: If you don't have Chocolate Dessert Topping, melt a few chocolate chips with
some of the remaining heavy whipping cream. Make sure you stir well to combine
and then put that on top of the pie and proceed with step 4.
5. Refrigerate for at least one hour.
6. Cut into tiny pieces for serving. Top with whipped cream if desired.
Enjoy!
11.04.2011
Fiesta Chicken Pockets
Sooo, I have good news and I have bad news. The good news is, I've made some really good food lately. The bad news is, I've forgotten to take pictures of my good food. Which means I can't post about them. Bummer!
Here's what you need:
2 Boneless, skinless chicken breasts
1 Bunch of Green Onions
8 Ounces Cream Cheese, Softened
2 Can of Crescent Rolls
Here's what you do:
1. Season the meat and cook it in the crock pot all day.
2. Finely slice the green onions.
4. Mix the green onions, Rotel, and green chilies with the cream cheese.
5. Add the cooled chicken to the cream cheese mixture.
6. Open the cans of crescent rolls and divide the dough into 16 triangles.
I do have one exception though. Remember when I made these chicken pillows? Well, I made them again, but I spiffied them up a bit. I figure since you can go here and see something close to what they're supposed to look like, it's okay for me to post without a picture, right? Besides, I don't have anything else to post right now. And something is better than nothing, right?
Also, nobody came up with any fabulous name ideas for the chicken pillows, so I went ahead and spiffied up the name myself while I was spiffing up the recipe. It's no literary gold, but I'm pretty sure anything beats "chicken pillows". I made these one Sunday after working on my house all day. My mom had thrown the chicken in the crock pot that morning, which made it delicious and super tender, and I threw the pockets together that evening. They came out delicious and were really simple -- especially since the chick was already cooked.
2 Boneless, skinless chicken breasts
1 Bunch of Green Onions
8 Ounces Cream Cheese, Softened
2 Can of Crescent Rolls
2 Cans of Rotel, well drained
1 Can of Green Chilies, well drained
Here's what you do:
1. Season the meat and cook it in the crock pot all day.
2. Finely slice the green onions.
3. Drain the Rotel and green chilies well.
Hint: Failing to drain these well will result in the chicken pockets being
mushy.
4. Mix the green onions, Rotel, and green chilies with the cream cheese.
5. Add the cooled chicken to the cream cheese mixture.
6. Open the cans of crescent rolls and divide the dough into 16 triangles.
7. Place one scoop of the cream cheese mixture in the middle of each crescent roll triangle.
8. Roll up each crescent roll like a jelly roll (beginning with the widest end).
9. Ensure that all seams are tightly sealed on each pillow.
10. Place the pockets on a cookie sheet, with as many seams down (against the cookie sheet) as possible.
11. Bake for about 12 minutes. Remove them from the oven when the crescent roll is golden brown and flaky.
8. Roll up each crescent roll like a jelly roll (beginning with the widest end).
9. Ensure that all seams are tightly sealed on each pillow.
10. Place the pockets on a cookie sheet, with as many seams down (against the cookie sheet) as possible.
11. Bake for about 12 minutes. Remove them from the oven when the crescent roll is golden brown and flaky.
Enjoy!
10.20.2011
Oreo Pie
I know it's Fall now and this is kind of a Summer recipe, but I've spent every. waking. moment. fixing up the house I bought so that I can move in already. This project is a lot more time consuming than I expected. So, I just haven't been able to cook nearly as much as I'd like (almost not at all **gasp**). This will all be worth it in the end. There is a brand new oven/stove just waiting for me to get the house done so I can get in there and use it! This is a delicious pie that is super simple to make and I haven't shared it yet. So here it is.
Here's what I used:
1 Oreo Pie Crust
8 Ounces of Cream Cheese, softened
8 Ounces Whipped Topping (Cool Whip), thawed
2 Tsp. Vanilla
1 Package of Oreo Cookies
Here's what I did:
1. Crushed 10 Oreo Cookies. I placed mine in a plastic baggie and beat them with a meat tenderizer.
2. Combined the Cream Cheese and the Whipped Topping.
3. Mixed in the vanilla.
4. Stirred the cookie pieces into the cream cheese/whipped topping mixture. Be careful to stir only long enough to evenly distribute the cookies.
5. Poured the mixture into the pie crust.
6. Refrigerated for a couple of hours to let it set up.
I garnished the pieces with a whole Oreo Cookie when serving. I've tried this with Double Stuff Oreos and it comes out just as good -- just a little more rich.
Enjoy!
10.07.2011
Sirloin Skillet
I'm always looking for a quick, easy dinner recipe. This is an old recipe that I had printed out at one time (apparently) and came across in all this moving mayhem. It still looked good, so I decided to give it a shot. It was simple and quick and tasted delicious. I served it over white rice. I think it would be delicious on a tortilla too.
Slightly adapted from: Campbell's Kitchen
Here's what I used:
2 Tablespoons Olive Oil
1 Lb Boneless Beef Sirloin Steak, diced
1 Large White Onion, diced
2 Medium Red Peppers, sliced
2 Medium Green Peppers, sliced
3 Cloves Garlic, Minced
1 Can (10.75 ounces) Condensed Cream of Mushroom Soup
1/2 Cup Water
1 Cup Shredded Cheddar Jack Cheese
Here's What I did:
1. Heat one tablespoon of Olive Oil in a skillet over medium-high heat.
2. Cook the steak in the oil until thoroughly cooked. Removed meat from skillet.
3. Reduce heat to medium and add the remaining (1 Tbsp) oil to the pan.
4. Add onions and peppers to pan. Cook for 3 minutes, stirring occasionally.
5. Add garlic and cook until the vegetables are tender.
6. Stir in condensed soup and water. Heat to boil.
7. Return meat to the skillet and reduce heat to low.
8. Cover and cook for about 2 minutes.
9. Sprinkle with cheese.
Enjoy!